다운로드 Graph Paper Gen PC 용
에 의해 게시 Heng Jia Liang
- 카테고리: Productivity
- 현재 버전: 1.0
- 파일 크기: 1.58 MB
- 호환성: 필요 Windows 11, Windows 10/8/7/Vista
에 의해 게시 Heng Jia Liang


APK PC 용 - 다운로드
| 다운로드 | 개발자 | 평점 | 리뷰 |
|---|---|---|---|
|
Graph Paper ( for S Pen )
다운로드 Apk |
MindBoard Apps | 2.1 | 191 |
|
Graph Paper ( for S Pen )
다운로드 Apk |
MindBoard Apps | 2.1 | 191 |
|
Graph Paper Generator
다운로드 Apk |
Pedro Masunaga | 3 | 100 |
|
Mr.GraphPaper
다운로드 Apk |
sincham | 2.5 | 195 |
|
mm Graph
다운로드 Apk |
ABHIJIT PODDAR | 3.1 | 138 |
|
Concepts: Sketch, Note, Draw 다운로드 Apk |
TopHatch, Inc. | 4.2 | 14,975 |
확인. 먼저 첫 번째 것들. 컴퓨터에서 응용 프로그램을 사용하려면 먼저 Mac 저장소 또는 Windows 응용 프로그램 저장소를 방문하여 Bluestacks 응용 프로그램이나 Nox App 을 클릭하십시오. 웹에있는 대부분의 자습서는 Bluestacks 응용 프로그램을 권장하며 컴퓨터에서 Bluestacks 응용 프로그램을 사용하는 데 어려움이있을 경우 쉽게 온라인 솔루션을 쉽게 찾을 수 있기 때문에 Bluestacks 응용 프로그램을 권장합니다. Bluestacks Pc 또는 Mac 소프트웨어 여기 를 다운로드 할 수 있습니다.
원하는 에뮬레이터를 다운로드 했으므로 컴퓨터의 다운로드 폴더로 이동하여 에뮬레이터 또는 Bluestacks 응용 프로그램을 찾으십시오.
찾았 으면 클릭하여 응용 프로그램 또는 exe를 PC 또는 Mac 컴퓨터에 설치하십시오.
이제 Next를 클릭하여 사용권 계약에 동의하십시오.
응용 프로그램을 올바르게 설치하려면 화면 지시문을 따르십시오.
위 내용을 올바르게 수행하면 에뮬레이터 응용 프로그램이 성공적으로 설치됩니다.
설치 한 에뮬레이터 애플리케이션을 열고 검색 창을 찾으십시오. 일단 찾았 으면 Graph Paper Gen 검색 막대에서 검색을 누릅니다. 클릭 Graph Paper Gen응용 프로그램 아이콘. 의 창 Graph Paper Gen Play 스토어 또는 앱 스토어의 스토어가 열리면 에뮬레이터 애플리케이션에 스토어가 표시됩니다. Install 버튼을 누르면 iPhone 또는 Android 기기 에서처럼 애플리케이션이 다운로드되기 시작합니다. 이제 우리는 모두 끝났습니다.
"모든 앱 "아이콘이 표시됩니다.
클릭하면 설치된 모든 응용 프로그램이 포함 된 페이지로 이동합니다.
당신은 아이콘을 클릭하십시오. 그것을 클릭하고 응용 프로그램 사용을 시작하십시오.
안녕하세요. Mac 사용자!
사용하는 단계 Graph Paper Gen Mac의 경우 위의 Windows OS와 똑같습니다. Nox Application Emulator 를 설치하기 만하면됩니다. Macintosh에서 Bluestack. 여기 를 얻을 수 있습니다.
Graph Paper Gen iTunes에서
| 다운로드 | 개발자 | 평점 | 점수 | 현재 버전 | 성인 랭킹 |
|---|---|---|---|---|---|
| ₩3,900 iTunes에서 | Heng Jia Liang | 0 | 0 | 1.0 | 4+ |
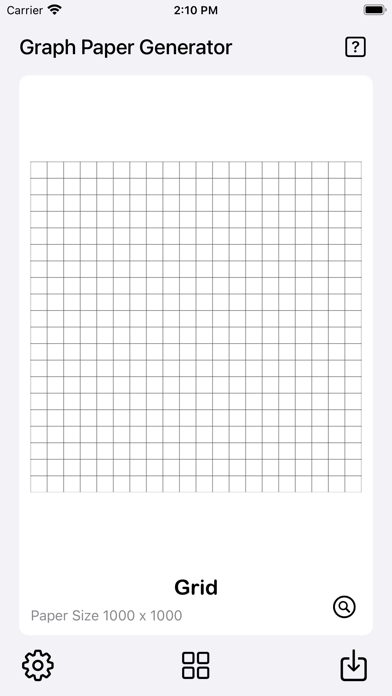
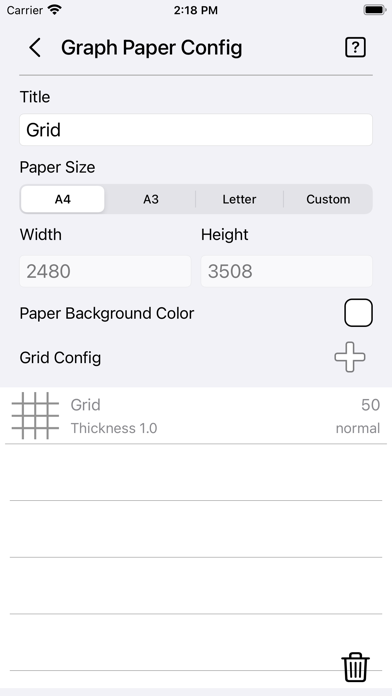
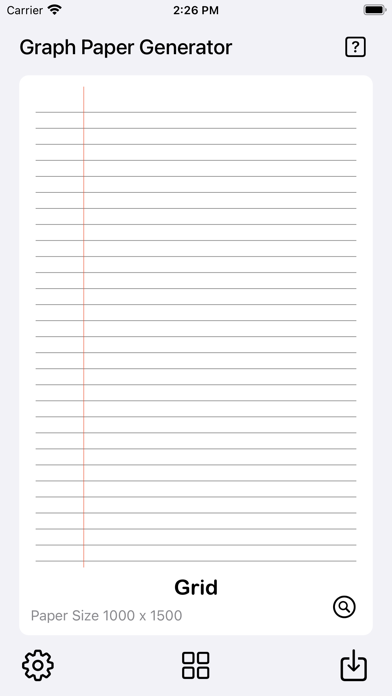
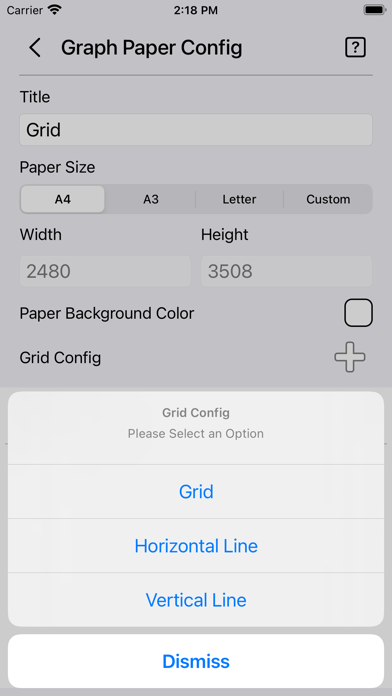
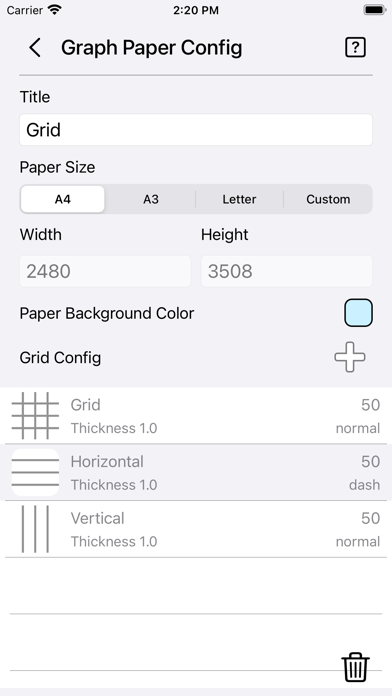
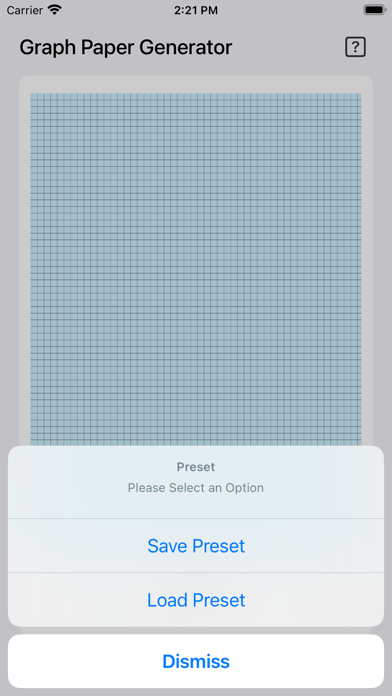
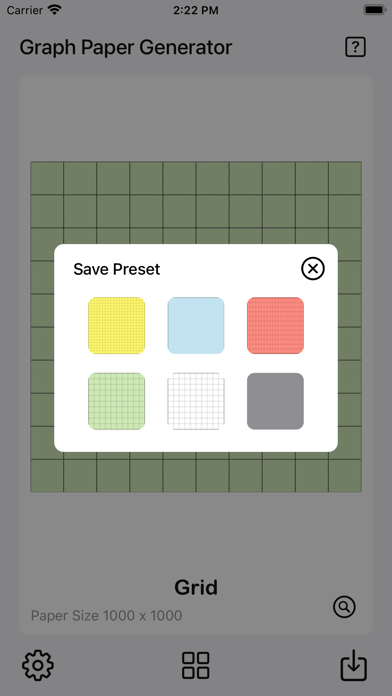
The Graph Paper Generator is a simple tool to generate grid paper. Save generate grid paper as image or PDF files with a pre-made guides ready to go to print. Features: • User friendly interface. • Add multiple grid/line with custom setting. • Quick preview on Graph Paper. • Instant grid paper generator. • Option to save grid config into the preset. • 6 preset slot available for saving or loading. • Option to save image into camera roll. • Option to save PDF into files. • Option to print. • 3 paper template ready for fast setting [A4, A3 and Letter]. • Custom paper size available. • Option to set paper color. • Grid configuration for grid, horizontal line and vertical line. • Add up to 6 grid/line configuration. • Option to set grid/line spacing. • Option to set Start X or Start Y position for Horizontal line and Vertical line. • Option to set line thickness range from 0.1 - 5.0. • Option to set grid/line color. • Option to set grid/line style from normal or dash. • Simple stat on how many lines or grid generate on paper. Quick Guide: - Tap on the setting icon on the bottom left to start. - Set the desired paper size. - Choose paper color or leave it as original white color. - Tap on the Plus icon beside the Grid Config. - Choose either Grid, Horizontal line or Vertical line. - Grid Config page will show up. - Set Grid/Line Spacing as desire. - [Below the page show the total grids/lines will be generated. Use it as reference.] - Set other parameter such as line thickness, line color or line style. - Tap back to the main page for a preview. - Use the preview mode to check the grid paper as you can zoom and pan for detail. - After done, you can save it into the camera roll as image or save it as PDF files for print. Save Presets: - Once you are done all the setting. - You can save it into a preset by tapping on the preset button. - Tap on Save Preset. - Tap on any empty slot and the preset is saved. - You can Tap on any slot to overwrite if you want to. Load Presets: - Tap on the preset button. - Tap on Load Preset. - Tap on any Preset Slot and it will load automatically. Thanks for your support and do visit nitrio.com for more apps for your iOS devices.